Safety Monitors
This guide describes the steps needed to setup a system wide Ascom Alpaca device driver to monitor the building roof status.
Adding Ascom Alpaca Device
Section titled “Adding Ascom Alpaca Device”Making the Ascom Alpaca device available system wide allows any program that works with the ASCOM platform available to use this device (eg. NINA & Voyager).
-
Open the Ascom Driver Connect Application (either 64 or 32 bit version). This can be found at:
"C:\Program Files (x86)\ASCOM\Platform\Tools\DriverConnect64\ASCOM.DriverConnect.exe" -
Select SafetyMonitor as the device type:
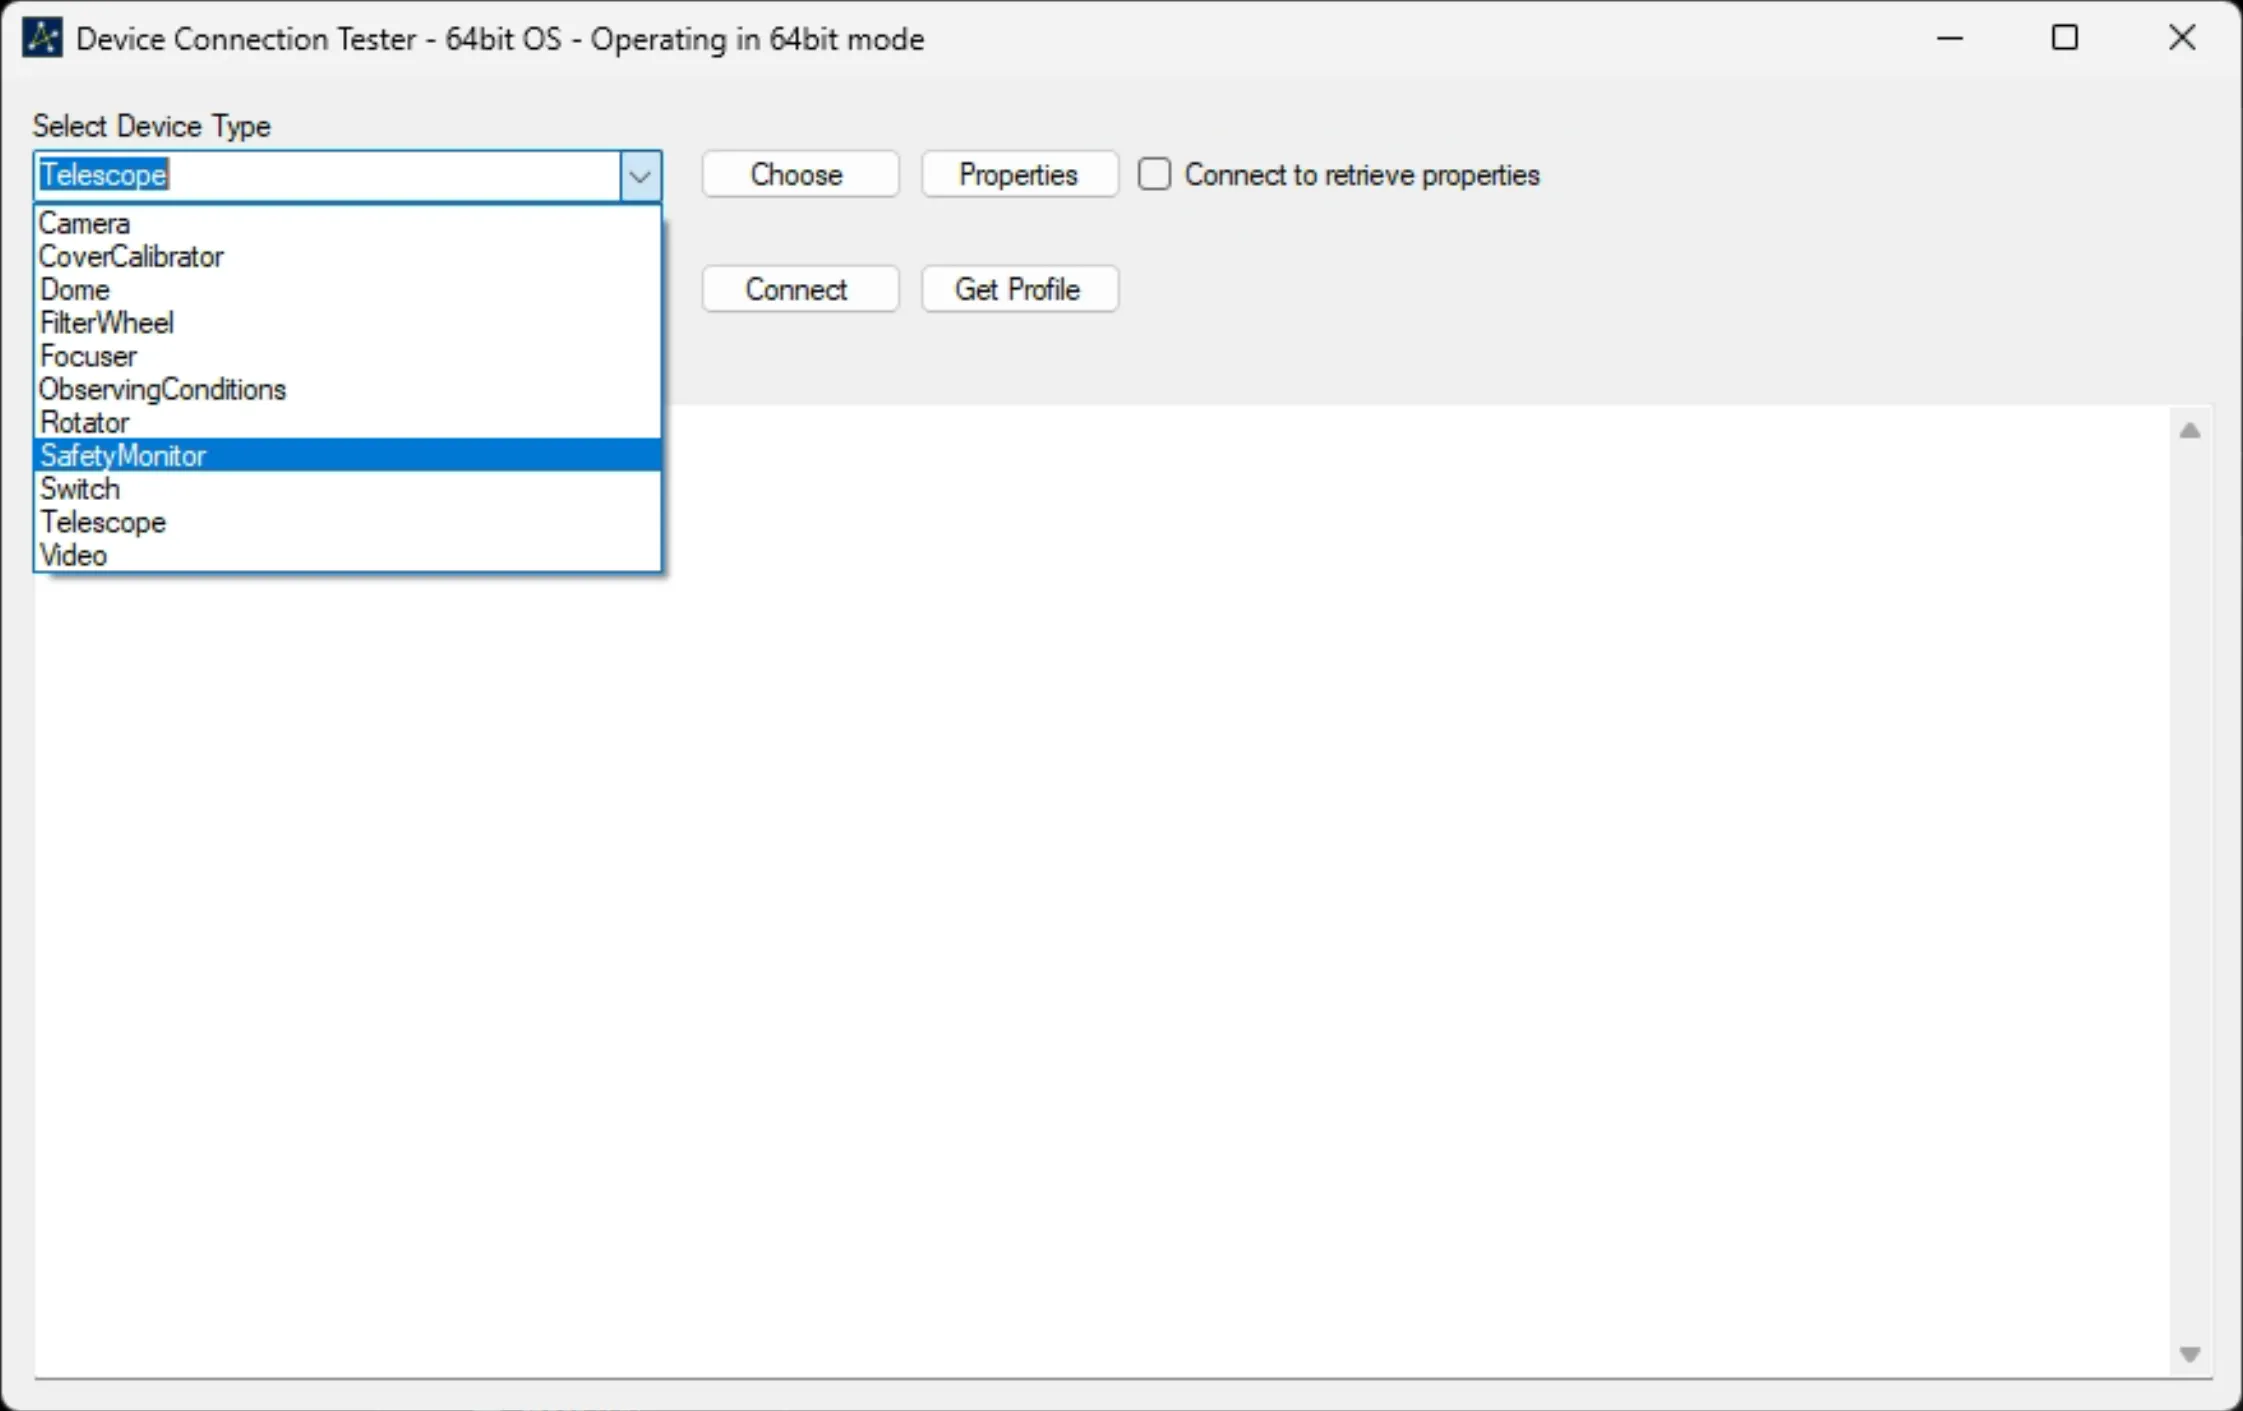
-
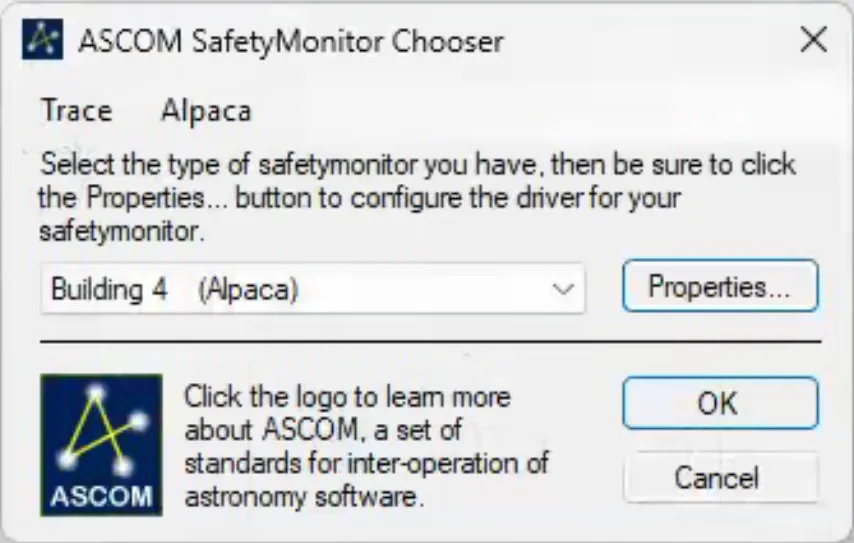
Click choose - A new Ascom device driver will pop up:
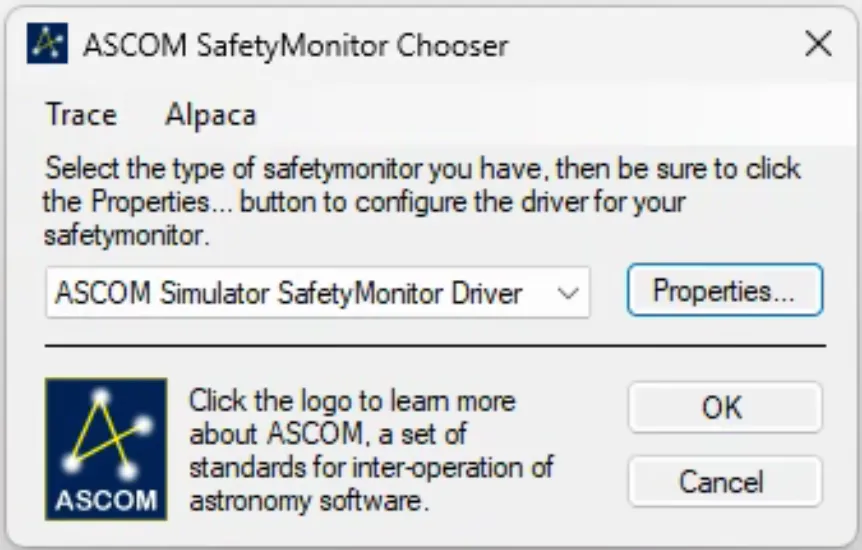
-
Select the “Alpaca” Menu at the top of the new window and then select “Create Alpaca Driver” menu option:
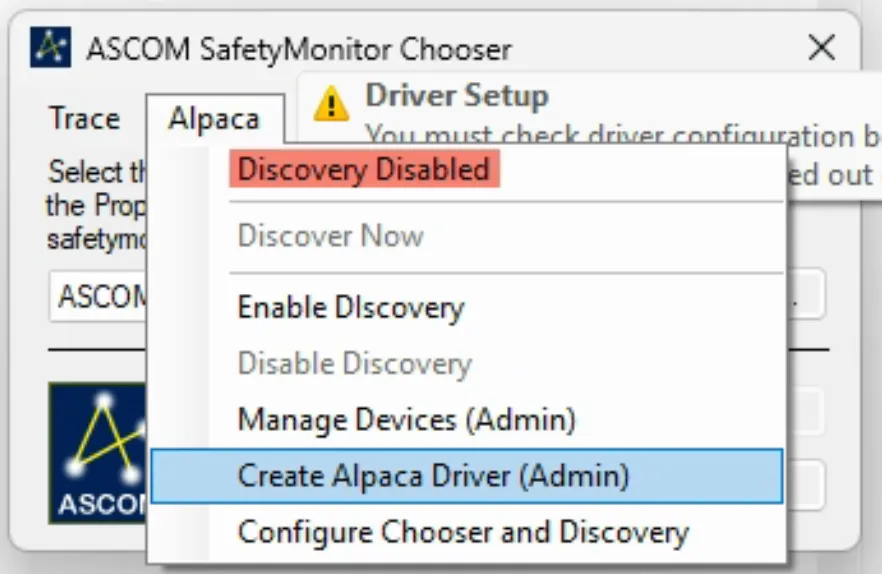
-
A new window will pop up asking you to name the device, enter
SFRO Building 1for example or another building you are setting up. This name will show up in NINA as a selectable device.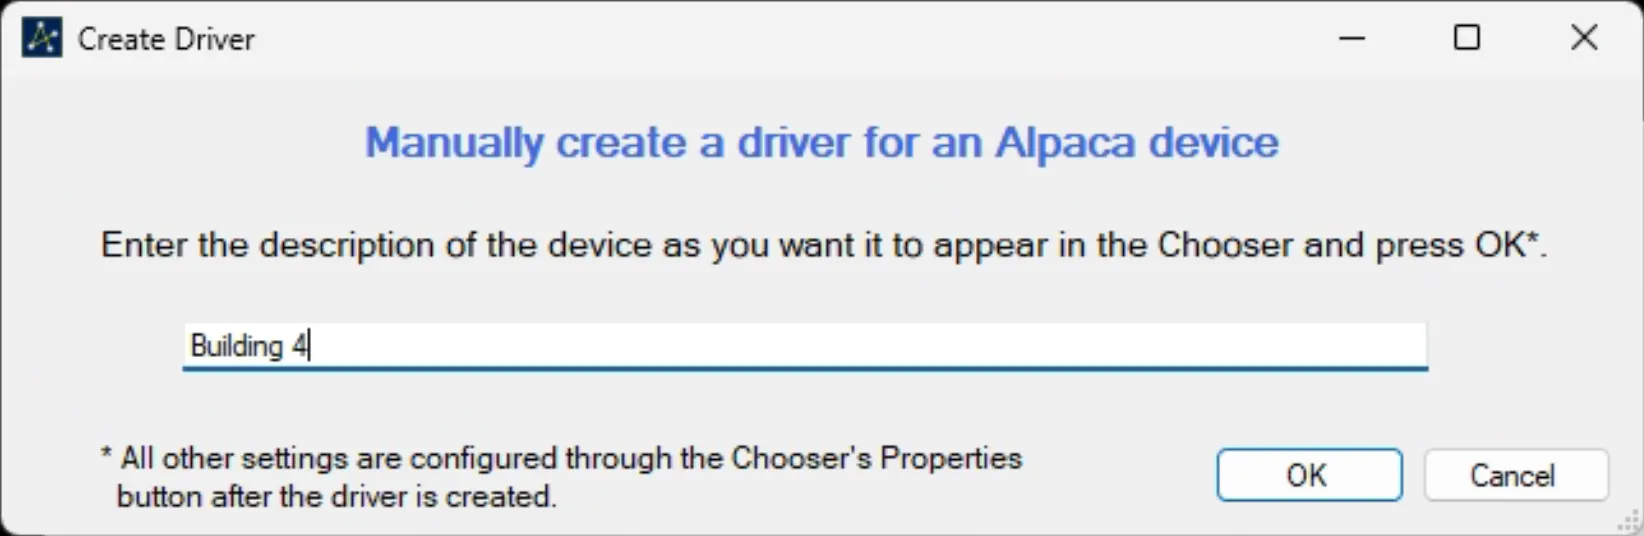
-
Click ok and then click accept on windows admin prompt
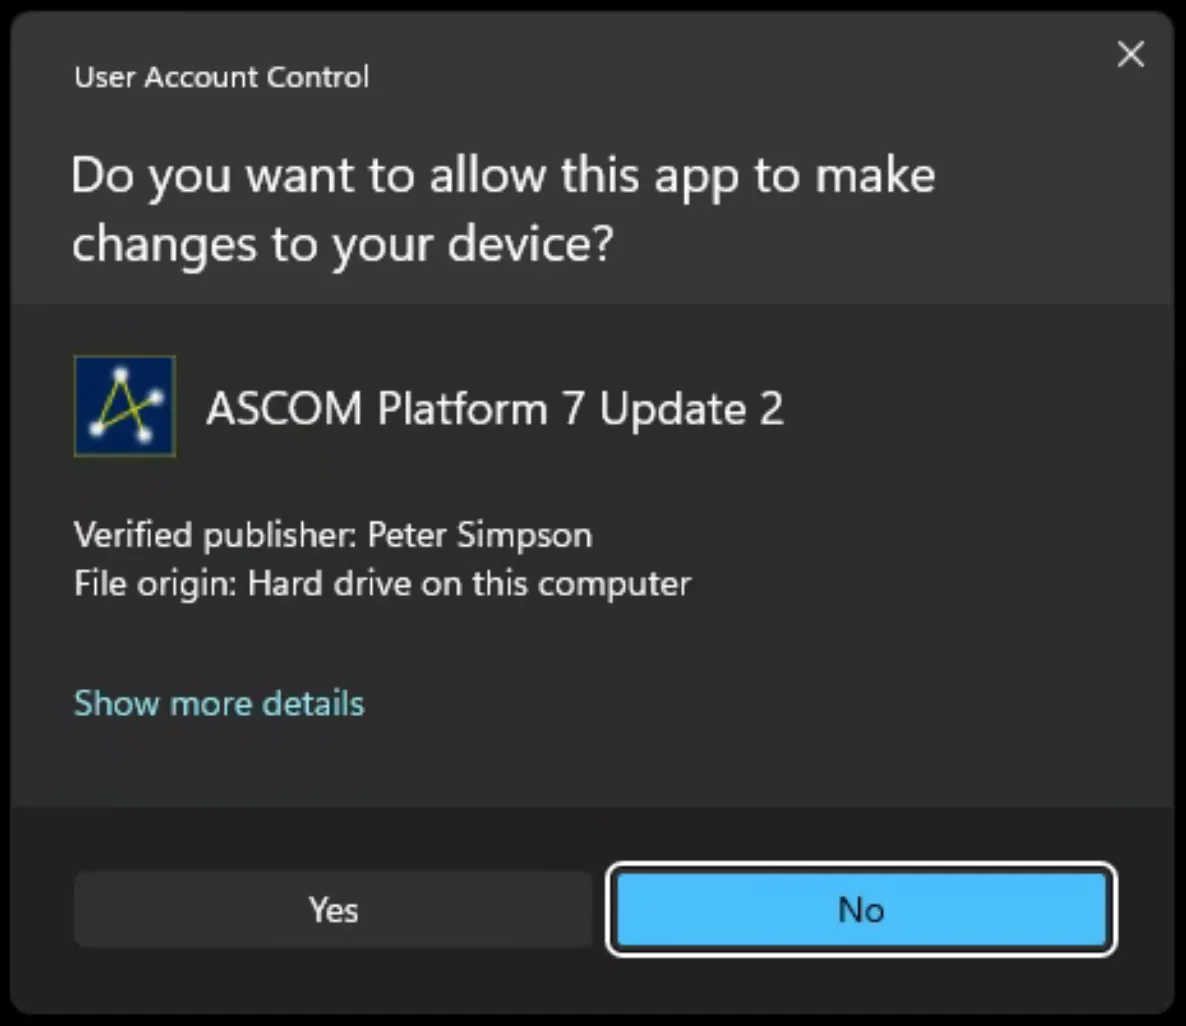
-
Back in Ascom driver mini window click
Properties(be sure the new device is selected), a new configuration window will pop up for this driver.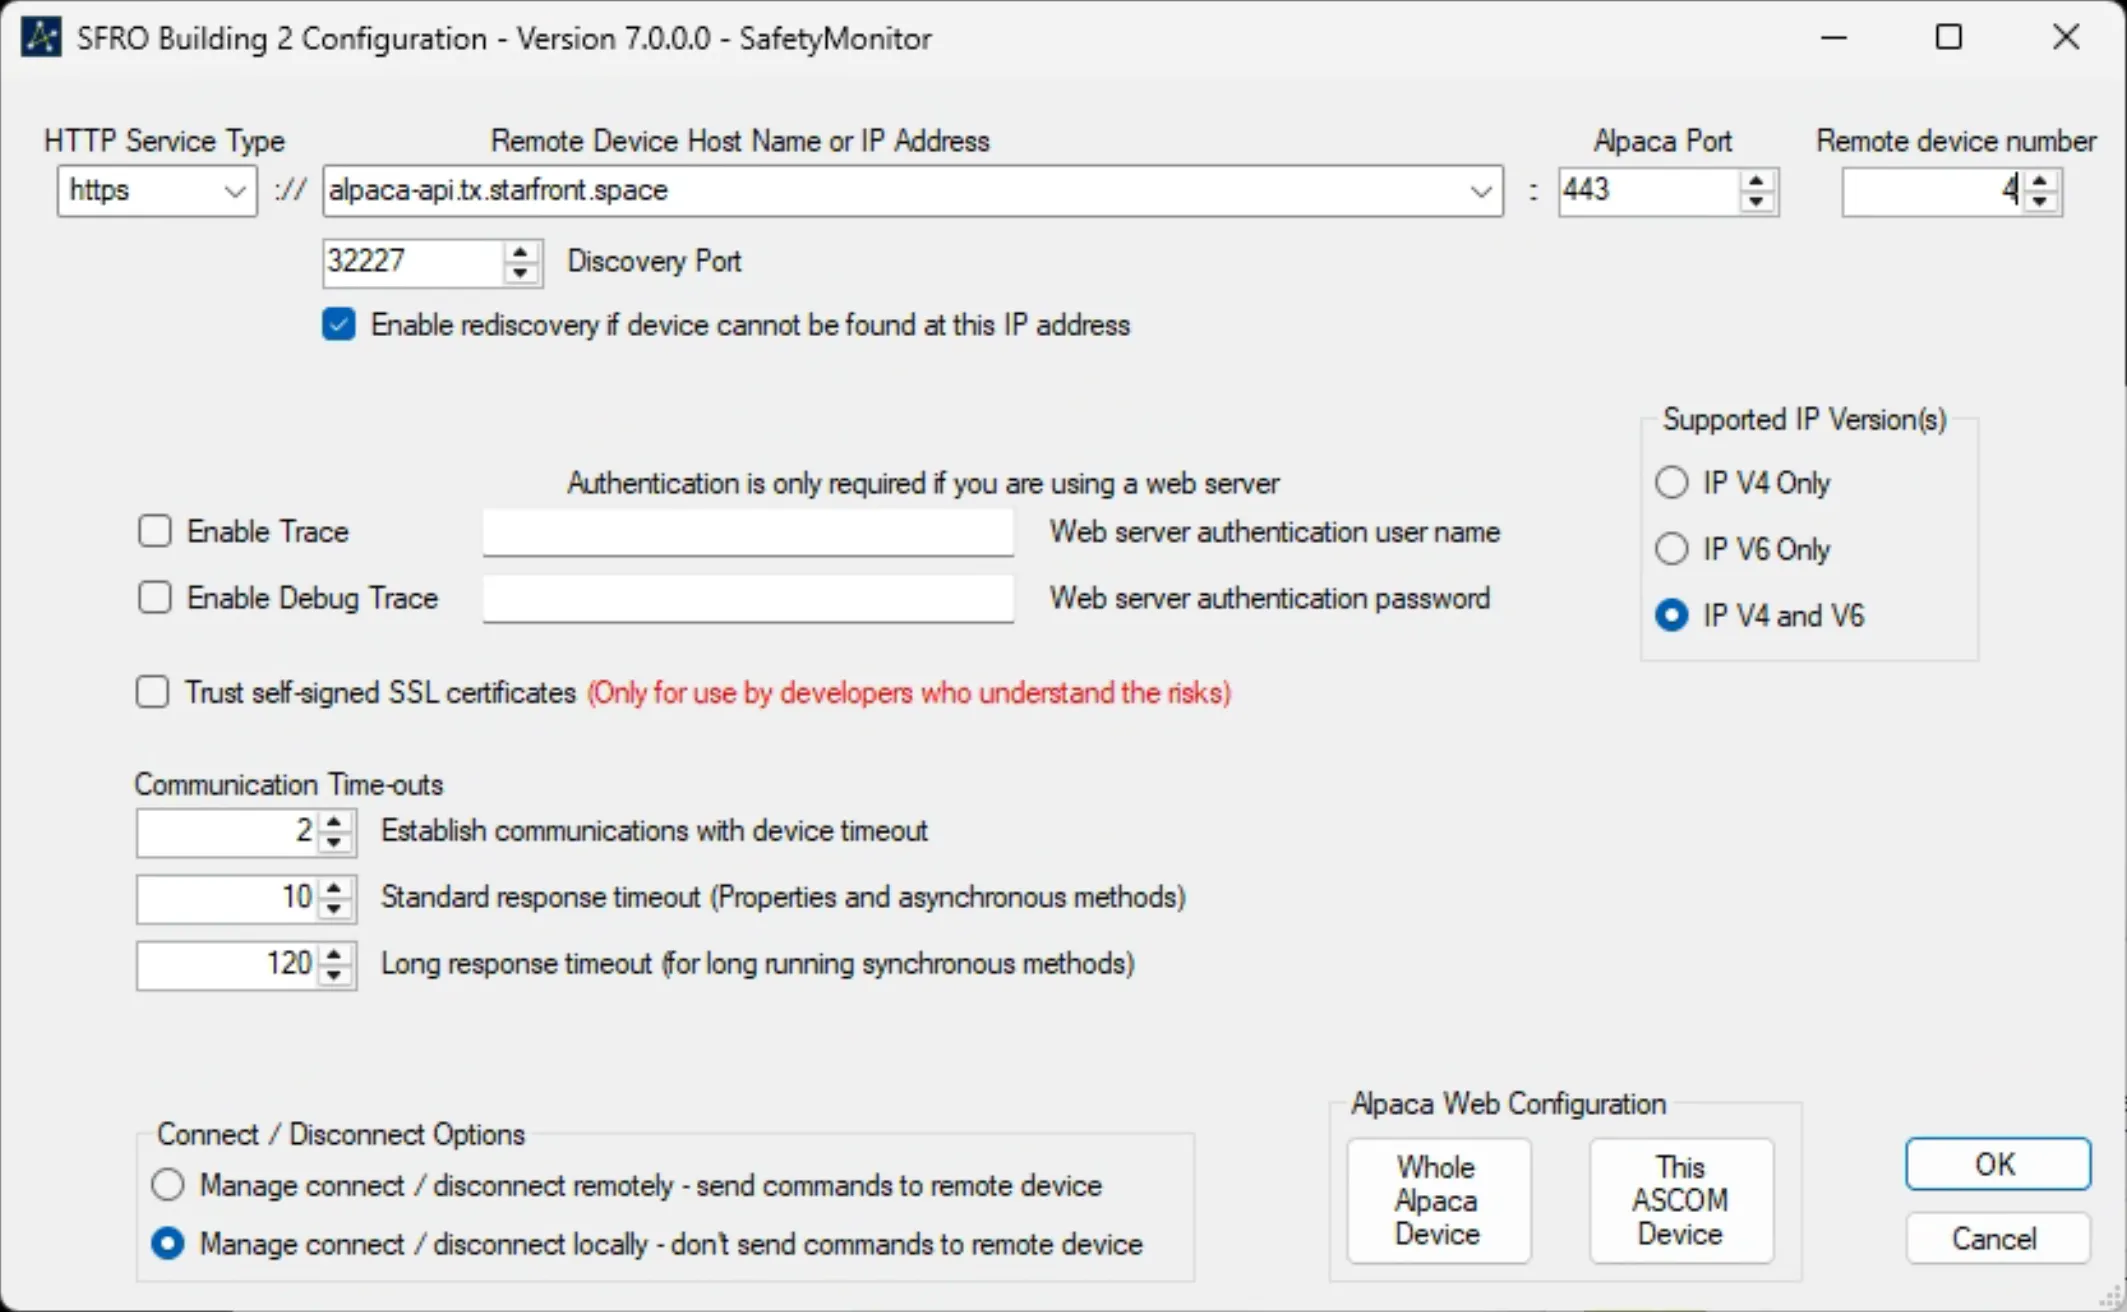
-
Enter these details precisely:
Input Value HTTP Service Type httpsHost Name or IP alpaca-api.tx.starfront.spaceAlpaca Port 443Remote Device number <pick_from_table_below> (eg, 4)Enable rediscovery uncheckedConnect / Disconnect Options Managed connect / disconnect locallyAll the other options can remain at their default values.
You will need a device number when configuring the Alpaca device. Please refer to this table:
Building Device Number Building 1 1Building 2 2Building 3 3Building 4 4Building 5 5Building 6 6Building 7 7Building 8 8Building 9 9Building 10 10Building 18 18Building 19 19Building 20 20 -
Click “OK” to accept the configuration.
-
Now back in the Ascom mini window again click ok to close this.
-
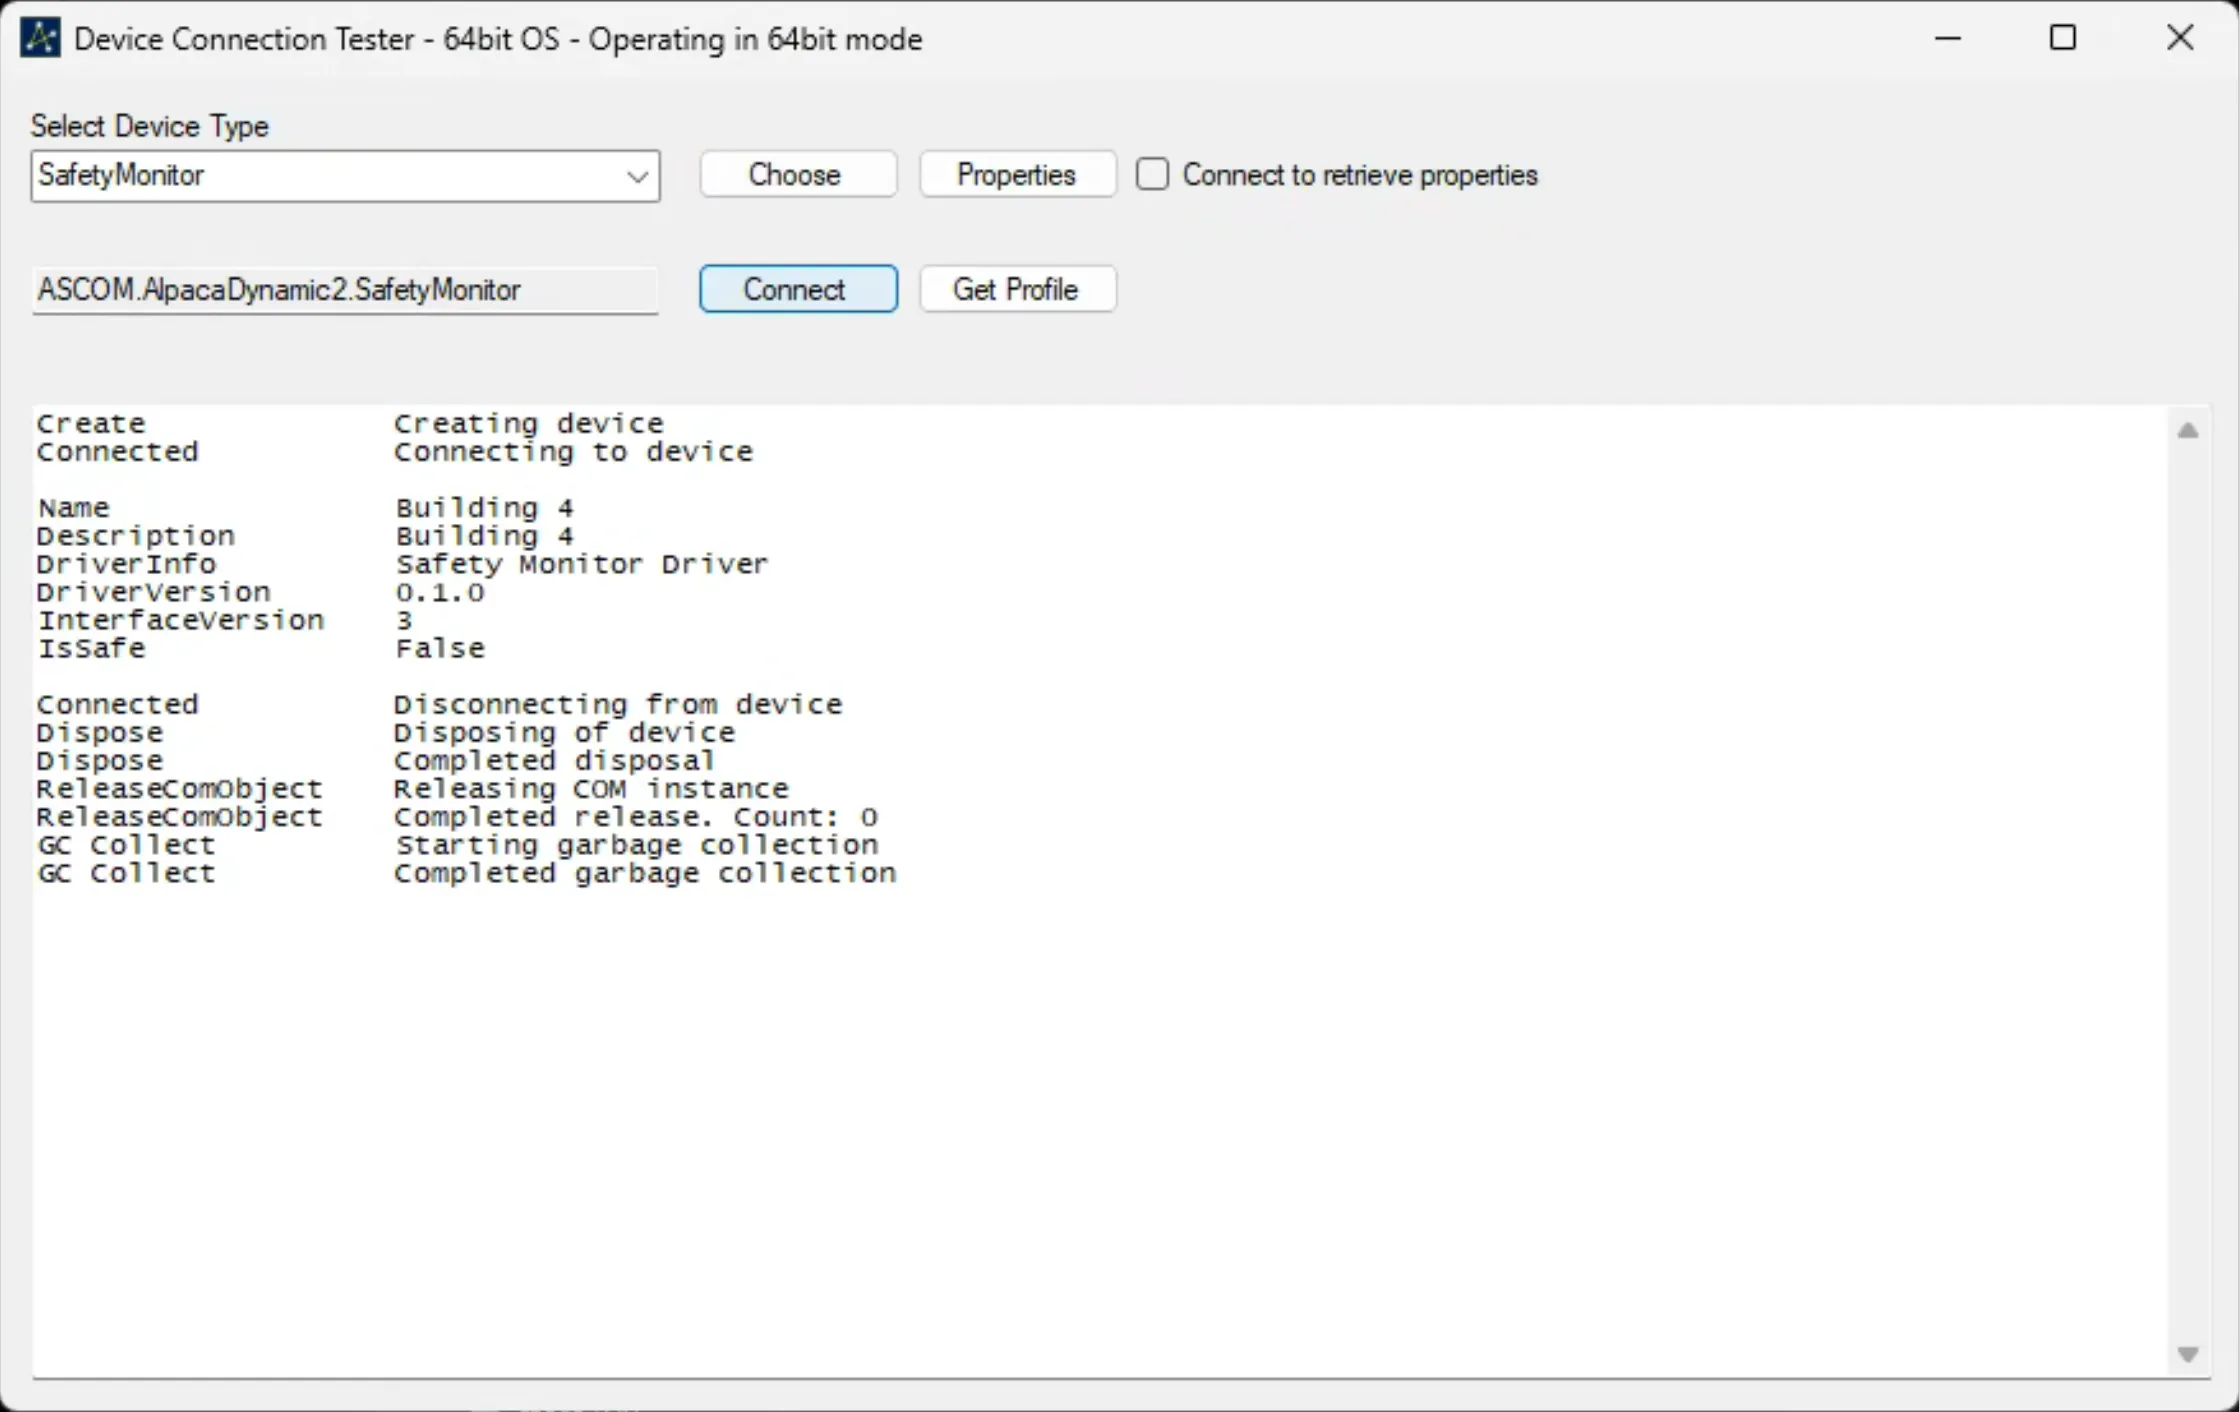
Now back in the window you first opened it’s time to test the driver. Click “Connect” and check the result.
If you configured everything successfully you should see a result that looks similar to this:
How to use in NINA
Section titled “How to use in NINA”-
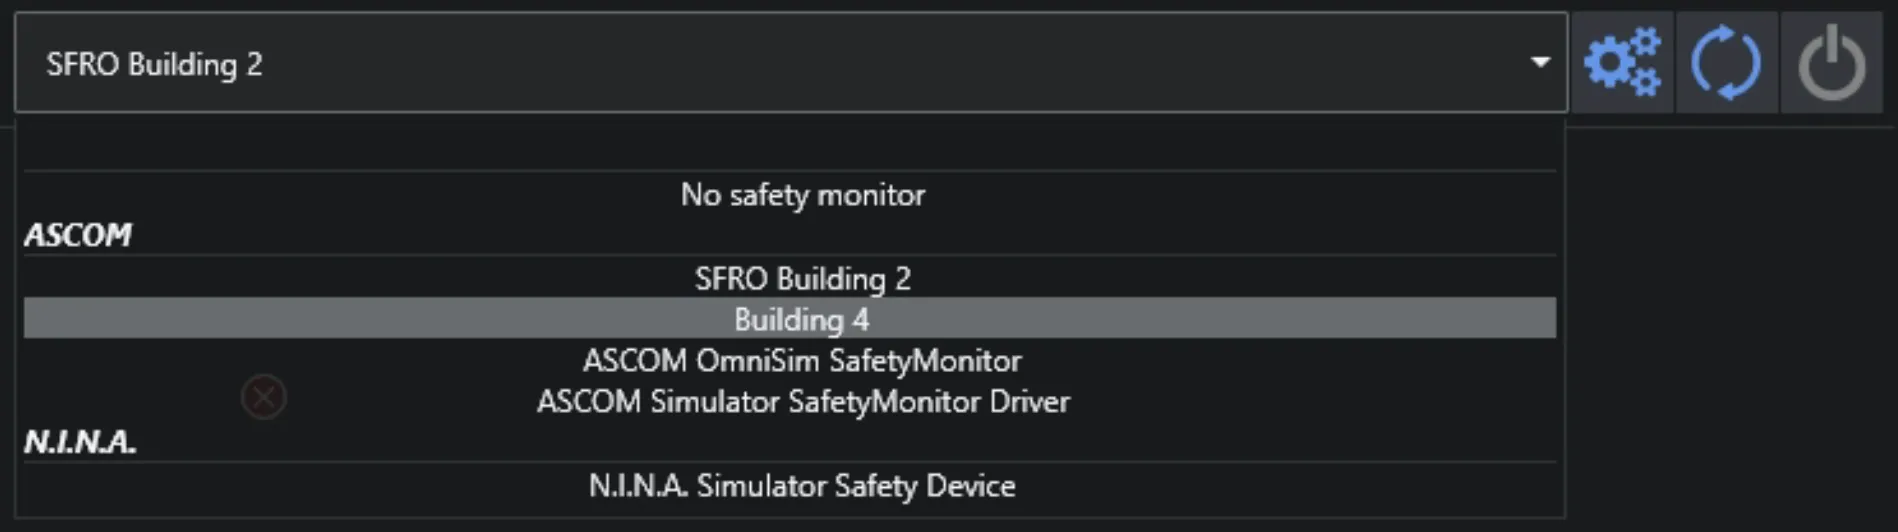
Open Nina and go to the equipment tab, select safety monitor device. Refresh the available devices and you should see the newly created device (named what you entered in step 6).
-
Select the new device and connect to it! Congrats you now have an Alpaca based safety monitor to StarFront setup that should be a LOT more reliable than previous file monitors.
YouTube Walkthrough
Section titled “YouTube Walkthrough”Troubleshooting
Section titled “Troubleshooting”If you encounter issues with setting up the device you can try to check the settings you configured or remove the device and try everything again.
Confirm Settings
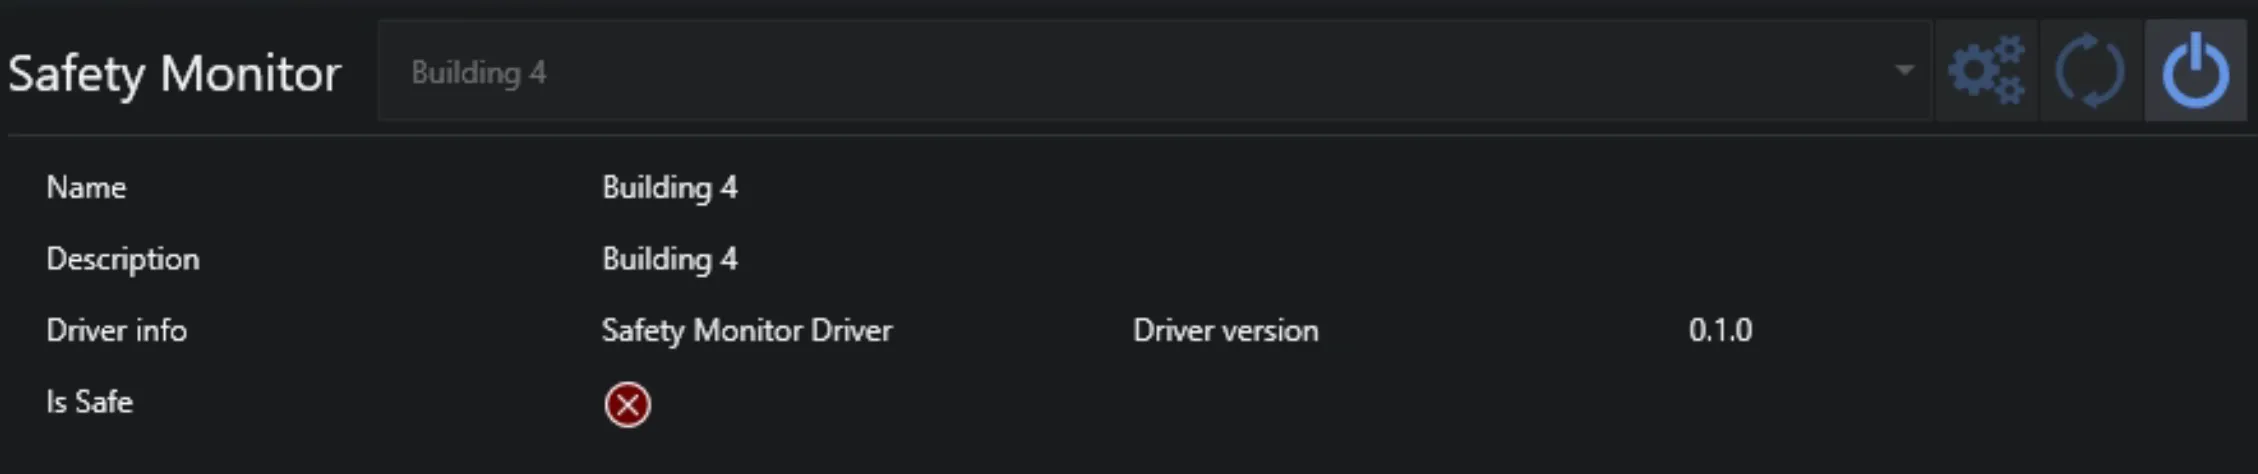
Section titled “Confirm Settings”In NINA you can select the device and click the gear icon. This will bring up the same configuration window that you setup in step 7 & 8 of the initial instructions. Any changes will be saved when you press OK to close.
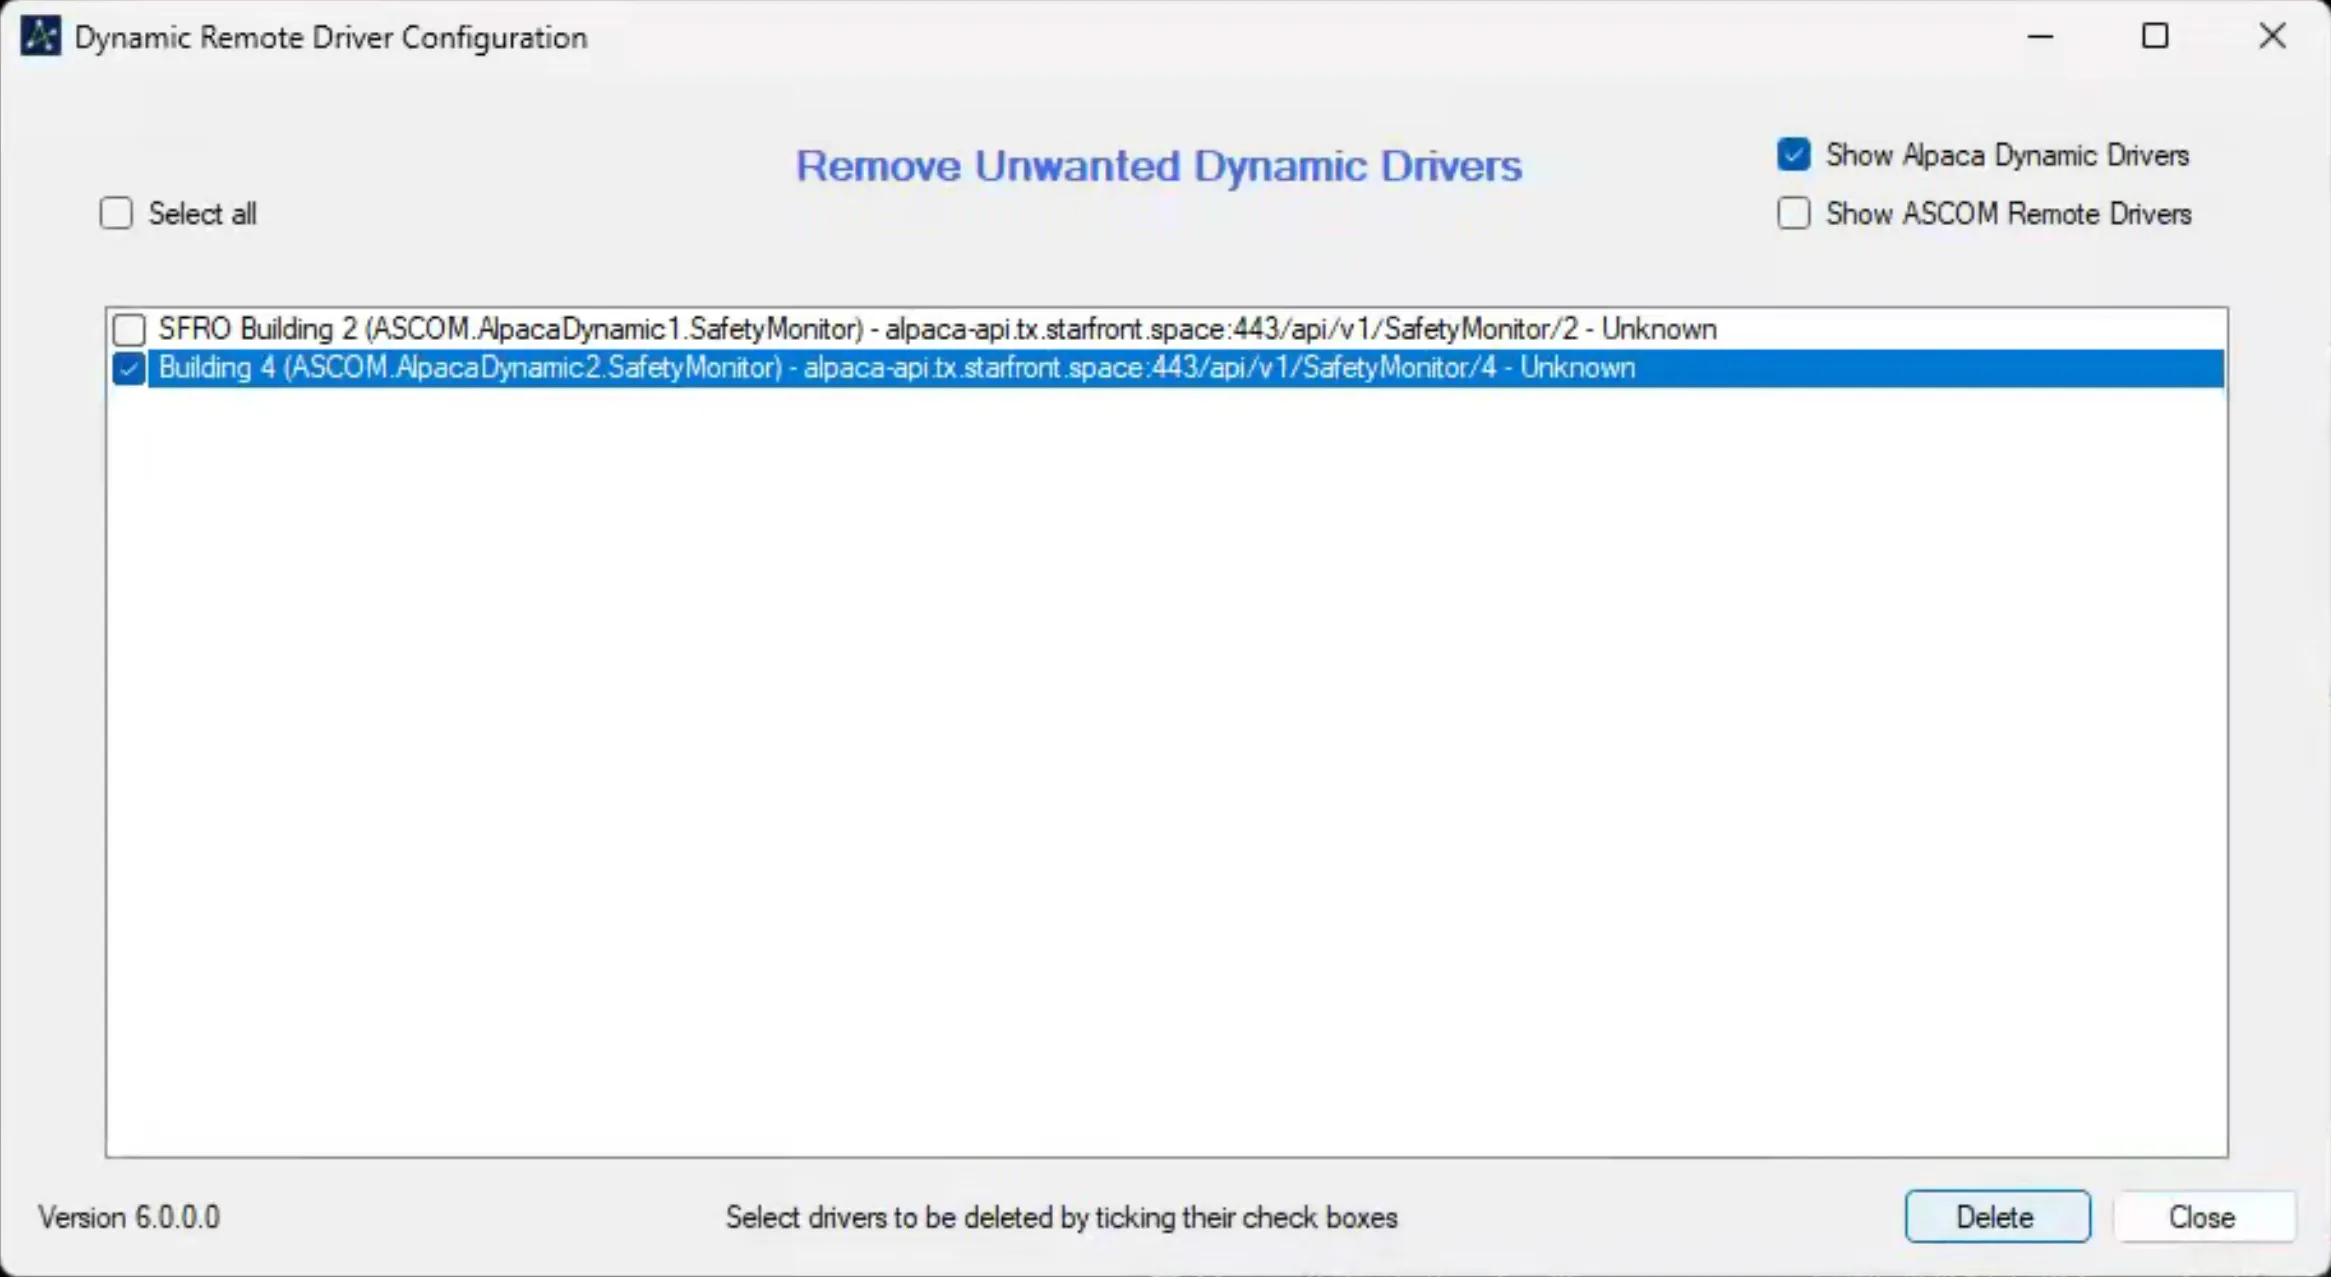
How to remove an Ascom Alpaca device
Section titled “How to remove an Ascom Alpaca device”-
Open the Ascom Remote Configuration Application. This can be found at:
"C:\Program Files (x86)\ASCOM\Platform\Tools\AlpacaDynamicClientManager\ASCOM.AlpacaDynamicClientManager.exe" -
Accept windows admin prompt
-
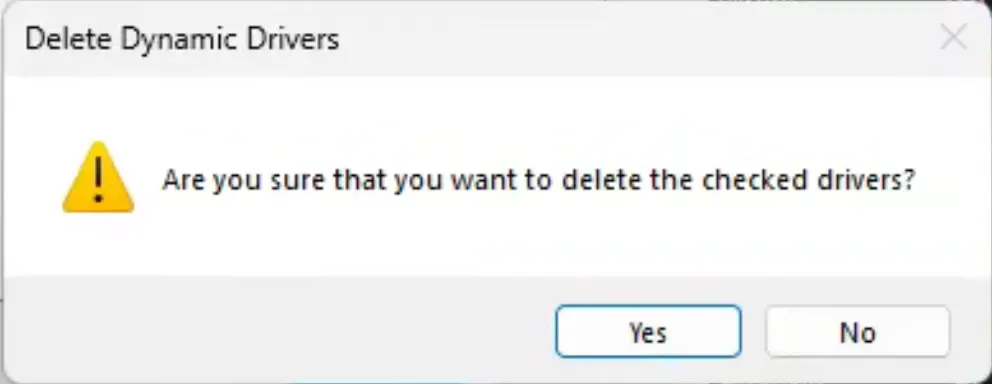
Select the device to delete by checking its checkbox, then hit delete. It should remove from the list. You can now close the window and reconfigure the device if needed.